
Contenu
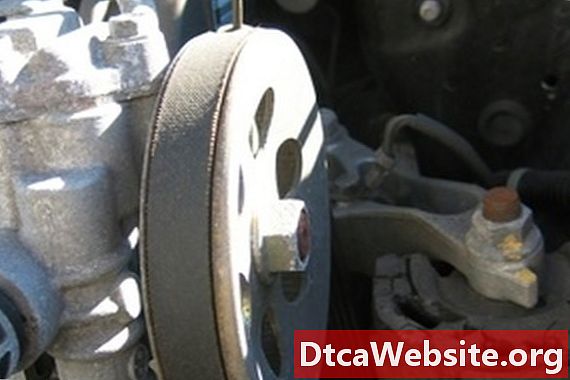
The TDIs serpentine belt is one of the cars most crucial components. A break in the belt will cause a loss of mechanical energy to the alternator, the generator which produces the electricity for the rest of the car and charges the battery, the power steering and the A/C. The driver could be placed in a dangerous situation if the belt were to ever break while driving. Replacing a damaged serpentine belt is of utmost importance and can be done in a just a few minutes.
Step 1
Put your safety glasses on. When doing any mechanical work on a car, it is very important to remember that safety always comes first.
Step 2
Apply the emergency brake. This will keep the car from moving back and forth during the installation process and is a necessary safety step.
Step 3
Jack the cars front end up and place jack stands under the cars frame rails. Place a wheel chock behind one of the cars back wheels. To make sure that the car is safely secure, nudge it back and forth slightly. If it doesnt move, the car is secured safely.
Step 4
Open the cars hood and remove the engine cover if it hasnt been removed already. The engine cover may have a screw holding it down, so remove it if one is present. The engine cover is held on by a retention device and can be popped off by applying equal, upward pressure. You should be able to see the serpentine belt clearly once youve removed the engine cover.
Step 5
Locate and remove the return hose marked blue. Use pliers to relieve pressure off the tension spring clamp in order to remove the hose. Collect any fuel that may leak out with a clean cloth.
Step 6
Insert and screw the M8x45 bolt into the threaded hole of the tensioner. Screw it in until the serpentine belt no longer has any tension holding it in place. Be careful not to over-tighten the bolt, as you may damage the tensioner as a result.
Step 7
Remove the serpentine belt and take note of how it was originally positioned. You will be installing the replacement belt in the same manner.
Step 8
Install the new serpentine belt. Mark the direction of rotation and make sure that the new serpentine belt is on all of the pulleys. More importantly, make sure that it is correctly positioned. You may have to get under the car for this step, so use a creeper or something equivalent if you do not want to rub your back against the floor.
Step 9
Remove the bolt from the tensioner. Ensure that the tensioner is properly positioned and applies tension to the belt correctly. Make sure once again that the belt is correctly placed on all of the pulleys.
Step 10
Install the return hose back to its original position. Make sure that the tension spring clamp secures the return hose properly.
Turn the car on and and check the belt operation. If it runs correctly, lower the car and replace the engine cover.
Items you will need
- Replacement serpentine belt
- Safety glasses
- Jack stands
- Floor jack
- Creeper (Optional)
- Wheel chock
- Socket set
- Wrench
- M8x45 hex bolt or equivalent
- Towel
- Pliers


