
Contenu
The braking system on a Kia includes several components. The brake pads are the most often changed parts of the system. The rotors require less frequent repair or replacement, but they are relatively easy to remove and replace. The caliper is connected directly to the brake line. The brake line feeds brake fluid to the caliper, causing the brake pads to make contact with the rotors during braking. When changing the brakes, all of these components need to be removed and replaced properly.
Step 1
Open the hood of the Kia and remove the cap from the master cylinder. Put the transmission in "park" and apply the parking brake.
Step 2
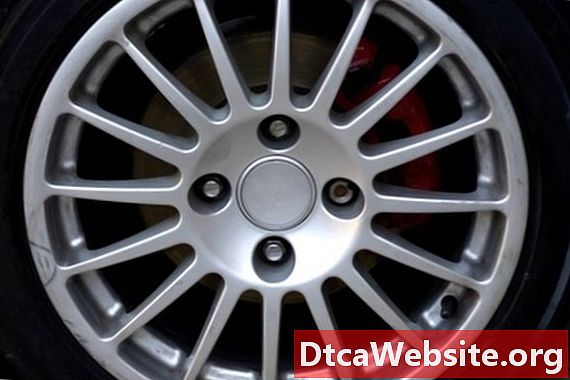
Loosen the lug nuts on the wheels. Place the jack beneath the frame of the Kia. Lift the vehicle and place jack stands beneath the frame. Remove the lug nuts and pull the wheels from the wheel bolts.
Step 3
Remove the two caliper bolts with the Torx socket and ratchet. Pull the caliper from the rotor. Disconnect the brake line from the caliper with the 10 mm wrench. Place the brake line in the drip pan below.
Step 4
Place the new brake pads into the new caliper. Connect the brake line to the new brake caliper.
Step 5
Pull the rotor from the wheel bolts. Spray the rotor with chain lubricant if there is rust present, preventing the rotor from being easily pulled from the bolts.
Step 6
Spray the new rotor with brake cleaner spray and wipe the entire rotor with a clean towel. Place the new rotor into the wheel bolts, with the raised "top hat" section facing outward.
Step 7
Place the new caliper onto the new rotor. Tighten the caliper bolts with the Torx socket and ratchet.
Step 8
Place the wheel onto the wheel bolts and screw on the lug nuts.
Step 9
Lift the vehicle to remove the jack stands. Lower the Kia onto the ground and tighten the lug nuts with the tire iron.
Step 10
Press the brake pedal three times slowly. At the end of each depression, hold the pedal for 10 seconds.
Fill the master cylinder with brake fluid. The fluid level should be to within 1/4 inch from the top of the container. Place the cap onto the master cylinder and close the hood.
Tip
- Pressing the brake pedal after replacing the brakes forces brake fluid into the new caliper. The first depressions will offer little resistance. By the third time, the pedal response should be normal.
Items you will need
- Tire iron
- Tire blocks
- Lifting jack
- Jack stands
- 5/8-inch Torx socket
- Ratchet
- Hammer
- 10mm wrench
- Drip pan
- Rotor
- Brake pads
- Caliper
- Chain lubricant
- Brake fluid


