
Contenu
Use vinegar as a carburetor cleaner fluid instead of paying for a carburetor cleaning fluid. If the cleaning is done regularly as normal maintenance of the vehicle, vinegar does a better job. It will still work for occasional cleaning but requires more elbow grease with a wire scrub brush.
Step 1
Detach the battery from the negative terminal and put a cover on the terminal to prevent electrocution and fire.
Step 2
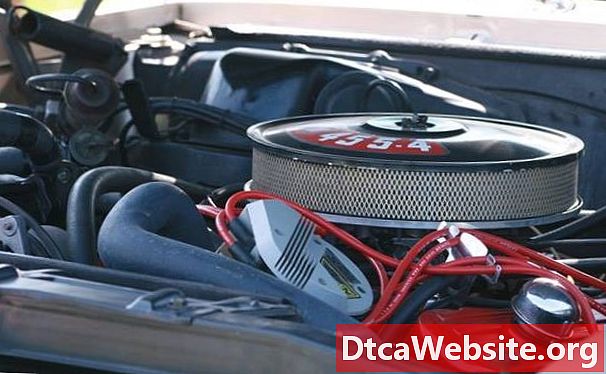
Remove the air filter. The air filter housing is the prominent part on the top of the engine that looks like a giant tin in most cars that covers the air filter. The filter housing is round and approximately one-and-a-half feet wide (though size varies greatly by vehicle). Unscrew the wing-nut on the top. Disconnect the air filter housing from any hose if there is one connected to it. Lift the air filter housing off of the carburetor.
Step 3

The carburetor is shaped like a small metal block with a lot of holes in it. It usually feed directly into the carburetor except in race cars. Label each part (hoses, cables, and wires) attached to the carburetor to help put everything back on the carburetor later. Start disconnecting the carburetor from the connections to hoses, cables, and wires. Tie back any parts that get in the way with string.
Step 4
If the carburetor has an AC kick-up solenoid and bracket that needs to be be unscrewed and removed. Fords have a kick-down linkage bar held on by a locking ring. Remove the locking ring with pliers and slide the arm off the carburetor. If the vehicle has a linkage cable instead of a linkage bar (almost all cars), the kick-down cable has a plate at the end that slides off once the throttle lever is slid into the area where the hole in the plate widens.
Step 5
There is a rod that opens and closes the choke by rotating an external plate. Remove the rod from this plate. If the carburetor does this with hoses, the hoses will detach by unscrewing the connectors at the ends or (if these are not present) by pulling firmly on the hose. if the choke is electric, label the wire(s) and disconnect them by sliding them off.
Step 6
Remove the carburetor by disconnecting the (usually) four nuts that keep it mounted to the engine. Turn the carburetor upside down over a container to catch any remaining gasoline. Cover the area where the carburetor was sitting to keep it free of debris. Do everything in reverse to put the carburetor back on after it is cleaned.
Step 7
Take apart the carburetor, taking note where all the pieces go. My advice is that you buy a Chiltons manual or find an "exploded view" illustration of how the pieces all fit together since there are a lot of parts.
Step 8
Get a five gallon frosting bucket from a local bakery and wash it out well. Do not use the bucket for food later after having used it to clean engine parts. Put the carburetor parts in the bucket. Fill the bucket enough to cover the carburetor completely with distilled white vinegar. Use a wire brush on the parts after twenty four hours to finish the job of removing the residue.
Rinse off the parts with water mixed with baking soda in it until the solution quits bubbling. Rinse off any baking soda with distilled water (available at the grocery store). Allow the parts to dry thoroughly before putting the carburetor back together.. Reinstall the carburetor in the engine with all of the parts previously labeled for easy attachment. Re-seat the air filter housing on top of the carburetor (and reconnect to any hose if there was one). Put the wing nut back on the threaded bolt sticking up through the housing and hand tighten it.
Tip
- Lay a rag under hoses as they are disconnected so that they do not spill contents that they may have into the engine. Keep track of every piece of the carburetor and the attachments on the carburetor. Put a piece of tape to indicate where each attachment point (hose, cable or wire) was for re-attachment. Make sure to number the attachments so that none are forgotten.
Warning
- Wear goggles. Gasoline in likely to squirt out when the fuel line is disconnected. Do not add anything to the vinegar since it may cause an undesired reaction (like a toxic gas, for example).
Items you will need
- Pliers Screw driver Standard wrench set Vinegar


