
Contenu
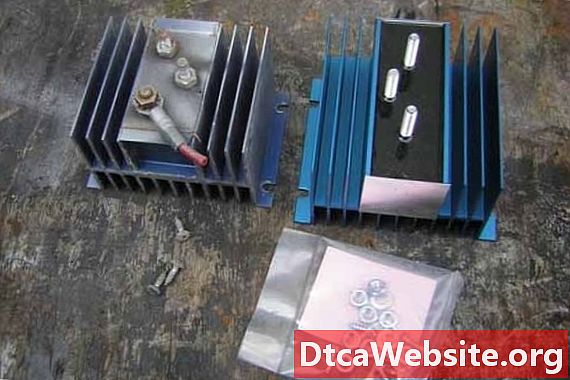
A battery isolator is a necessity in any camper that uses a separate battery to power lights and other accessories when the engine is off but recharges when the engine is on. An isolator performs three functions: it prevents the house battery from backflowing and overcharging the engine battery when charged to full capacity, it prevents a surge from the camper accessories from effecting your engines electrical system and it prevents your accessories from draining your engine battery. You can install a battery isolator in a camper in about 1/2 hour. No matter what brand isolator you buy, the steps and the markings you need to follow to correctly connect it will be the same.
Step 1
Decide where you will want to mount the battery isolator. Pick a place that puts it between the engine battery and the house battery ,but make sure it is easily accessible should you need to perform any maintenance later. The isolator needs to be mounted to the actual metal frame of the vehicle, so make sure you can press it flush to the frame.
Step 2
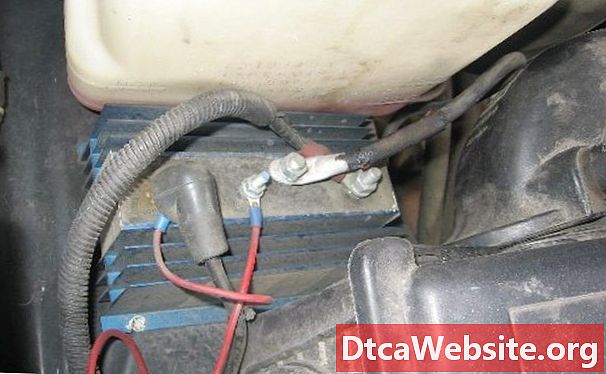
Hold the isolator in place and attach it by drilling in sheet metal screws through holes preset on the case of the isolator.. You want the battery isolator attached firmly enough that it will not come loose while driving your camper around. The main ground of the isolator is through the body of the case to the metal frame of the vehicle, so screw it down as well as you can.
Step 3
Disconnect the negative cable from your engines battery.
Step 4
Disconnect all the wires attached to the "BAT" terminal on your alternator.
Step 5
Connect all the wires that were on the "BAT" terminal to the terminal on your battery isolator labeled "1."
Step 6
Measure out a new piece of 14 gauge wire from the "BAT" terminal on the alternator to the terminal on the battery isolator marked "A." Cut the wire and crimp on two electrical connectors and attach the wire from "BAT" to "A."
Step 7
Measure out a new piece of 14 gauge wire from the terminal marked "2" on the isolator to the positive terminal on your house battery.
Attach the negative cable of the house battery to a solid ground on the vehicle frame, wire your accessories to the positive terminal on the house battery and then reconnect the negative cable on your engine battery.
Tip
- Attach one end of any new wire to the battery isolator, run the wire as it will be when you are done (under a rug, around furniture or through a firewall) and to its ending terminal before you cut the wire so you do not cut your new wire too short.
Warning
- Make sure that the negative cable of any battery is disconnected before attaching any accessories to the positive terminal to prevent shock.
Items you will need
- Drill
- Sheet metal screws
- 14 gauge wire
- Electrical connectors
- Electrical crimping pliers


