Contenu
Without it, your car cannot go anywhere. Yet, a starter solenoids only job is to complete the circuit between the battery and the starter when you turn the key to start. However, not every start goes as smoothly as it should, and the solenoid might refuse to crank the engine, disengage the pinion gear or might keep the starter motor running. Fortunately, even with very little knowledge of electricity you can learn to troubleshoot a problematic solenoid. Gain the skills to test both on-starter and remote-mounted solenoids. For these tests, it is better if you have the help of an assistant.
Step 1
Check that your car battery is fully charged before beginning these tests.
Step 2
Move the gear to neutral if you are diagnosing a car with a standard transmission or park if you are diagnosing a car with an automatic transmission.
Step 3
Apply the parking brake and make sure to stay away from moving engine parts as you proceed with these tests.
Step 4
Disconnect the coil high tension cable from the distributor cap and ground it using a short jumper wire.
Step 5
Ask your assistant to turn the ignition key to start while you listen for a click at the starter solenoid. If you hear a firm click, go to step 9 if you have an on-starter solenoid; go to steps 10 and 11 if you have a remote-mounted solenoid. If you hear a weak click or repeated click sounds, go to the next step.
Step 6
Unplug the small control circuit wire at the solenoid terminal. If there are two small wires, disconnect the one marked with an "S"; otherwise, check the wiring diagram for your particular vehicle to locate this wire.
Step 7
Connect a jumper wire to the battery positive terminal. As you bring the other jumper wire’s end in touch with the solenoid’s control circuit terminal you should hear a solid click; if you do not hear any sounds or hear a weak or chattering sound, make sure the solenoid is properly grounded and there is no corrosion or other substance preventing a good ground. Repeat the test. If you still don’t hear a solid click, replace the solenoid.
Step 8
Unplug the small control circuit wire at the solenoid terminal. Ask your assistant to turn the key to start. Using a voltmeter, test for voltage at the control circuit wire. If the meter reads 0 volts, there is an open in that part of the circuit preventing the solenoid from operating the starter. Locate and fix the open.
Step 9
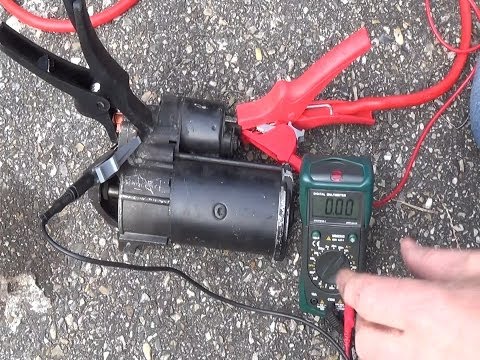
Ask your assistant to turn the key to start. Check for a voltage drop between the solenoids battery terminal and the starter motor strap. The voltage drop should be no more than 0.2 volts; otherwise, replace the solenoid. Make sure the battery cable is well connected to the solenoid. Remember, this step is only for an on-starter solenoid.
Step 10
Ask your assistant to turn the key to start. Check for a voltage drop across the two cable connections on the solenoid. The voltage drop should not exceed 0.2 volts. If it does, make sure the cable connections are completely clean and well connected. If you still read over 0.2 volts, replace the solenoid. Remember, this step and the next one are only for remote-mounted solenoids.
Unplug the small control circuit wire at the solenoid’s terminal. Using your multimeter, measure the resistance between the control circuit terminal and the solenoid’s ground bracket. If the resistance is above 5 ohms, replace the solenoid. Remember, this step is only for remote-mounted solenoids.
Items you will need
- Two jumper wires, 1 to 2-foot-long
- Multimeter


