Contenu
- Step 1
- Step 2
- Step 3
- Step 4
- Step 5
- Voltage Regulator Replacement
- Step 1
- Step 2
- Step 3
- Step 4
- Step 5
- Step 6
- Tips
- Items you will need
The voltage regulator/rectifier is an integral component within your Yamaha FZR 600s charging system. Its main duty is to change -- rectify -- the alternating electrical current supplied by the engines generator into the direct electrical current scale used by the battery and electrical system. The regulator then maintains a steady 14-volt DC current that will be used to keep the battery fully charged. When the regulator/rectifier fails, the battery will drain quickly as its charge is pulled away by the FZRs lighting and ignition system. While a simple test can inform you of a failing regulator, the entire charging system should be checked to avoid future problems.
Step 1
Park the motorcycle on its kick stand. Remove the seat, using the seat lock built into the left side of the tail fairing.
Step 2
Remove the screw from the left side of the tail fairing, near the seat rail, using a Phillips screwdriver or a 4 mm Allen wrench. Pull the left side of the tail fairing away from the motorcycle to reveal the voltage regulator/rectifier near the taillight.
Step 3
Set your multimeter to read a 12-volt DC scale, using the meters selector knob. Touch the multimeters red probe to the batterys positive terminal, marked with a plus symbol, and the black probe on the negative terminal. The battery must have a minimum of 12.3 volts DC as displayed by the multimeter. Charge the battery completely, using an automatic battery charger, if the batterys voltage is less than 12.3.
Step 4
Start the engine and let it idle in place for one minute. Reconnect the multimeter probes, red to positive and black to negative. Rev the engine to 3,000 rpm and take note of the batterys voltage, displayed by the multimeter. The battery should indicate a charging voltage of 14.0 to 14.4 volts DC. The voltage regulator is damaged if the voltage reading is less than 13.9 or greater than 15.3.
Step 5
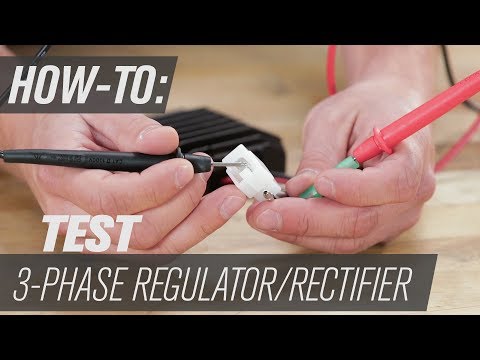
Stop the engine and turn off the ignition. Pull the wiring connector off of the rear of the voltage regulator. Set your multimeter to a Rx10 resistance setting, indicated by an omega symbol: Ω. Connect the red probe to the connectors upper terminal and the black probe to any of the two remaining terminals. The multimeter should indicate a resistance of 0.31 to 0.37 ohms. Move the black probe to the remaining terminal. The generators stator coil is damaged and must be replaced if either terminal produces a resistance value less than 0.31 ohms.
Hold the left tail fairing against the motorcycles seat rails. Push the bosses on the inner face of the cover into the grommets built into the seat rails. Screw the left tail fairing screw into place. Reinstall the seat onto the motorcycle.
Voltage Regulator Replacement
Step 1
Park the motorcycle on its kick stand. Remove the seat, using the seat lock built into the left side of the tail fairing.
Step 2
Unscrew the batterys negative terminal bolt using a Phillips screwdriver. Lift the negative battery cable away from the terminal and the motorcycles frame.
Step 3
Remove the screw from the left side of the tail fairing, near the seat rail, using a Phillips screwdriver or a 4 mm Allen wrench. Pull the left side of the tail fairing away from the motorcycle to reveal the voltage regulator/rectifier near the taillight.
Step 4
Remove the voltage regulator using a 10 mm socket and a socket wrench. Unplug the wiring connector from the voltage regulator.
Step 5
Mount a new voltage regulator onto the frame. Screw the regulator mounting bolts into place, then tighten the bolts to 7.6 foot-pounds using a torque wrench. Plug the electrical connector into the voltage regulator.
Step 6
Reconnect the negative battery cable to the negative battery terminal. Screw the terminal bolt into place.
Hold the left tail fairing against the motorcycles seat rails. Push the bosses on the inner face of the cover into the grommets built into the seat rails. Screw the left tail fairing screw into place. Reinstall the seat onto the motorcycle.
Tips
- Your FZR 600s voltage regulator can fail without damaging the generators stator. But when the stator fails, it usually damages the voltage regulator. Always test both components if you suspect a failure.
- A distinct sulfurous odor is an indication of a bad voltage regulator. This odor is giving off of by an overcharging battery as its electrolytic fluid boils.
Items you will need
- Phillips screwdriver
- Allen wrenches
- Multimeter
- Automatic battery charger
- 10 mm socket
- Socket wrench
- Torque wrench


