Contenu
- On-Bike Testing
- Step 1
- Step 2
- Bench Testing
- Step 1
- Step 2
- Step 3
- Step 4
- Step 5
- Step 6
- Step 7
- Step 8
- Step 9
- Warning
- Items you will need
Harley-Davidson motorcycles rely on an electromagnetic solenoid to activate the engines electric starter motor. When power is applied to the solenoid, a retractable pinion gear is pulled into place between the engines starter clutch and the starter motor. This action is followed by a distinct click before the engine is cranked to life. When the solenoid fails, it usually locks the pinion gear into its fully-extended "at rest" position, preventing the starter from engaging the engine. While the solenoid itself can be removed and tested, a simple "on-bike" test of the starters electrical system should be done to avoid unnecessary work.
On-Bike Testing
Step 1
Check the visual condition of the starter and the starter solenoid, located on the right side of the engine behind the rear cylinder. Specifically look for loose wiring connections or damaged wiring. Tighten loose terminal nuts using a combination wrench. If the wiring is damaged, repair the broken wire with a soldering iron.
Step 2
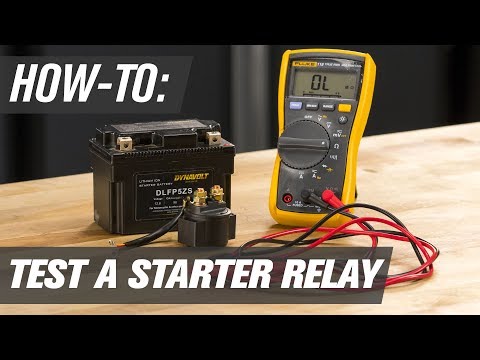
Turn the ignition switch to the "Off" position and remove the seat from the motorcycle, using either a flat-head screwdriver or by unscrewing the seat bolt by hand. Set a voltmeter to read a 12-volt DC scale, using the meters selector knob. Place the meters black probe on the batterys negative terminal (the terminal with the minus sign) and the red probe on the positive terminal (the terminal marked by a plus sign). The voltmeters display should indicate a minimum voltage reading of 12.3 volts DC. Recharge the battery if the battery voltage is less than 12.2 volts.
Move the voltmeters red probe to the solenoids power input terminal, located on the top of the starter solenoid. Turn the ignition switch on and shift the motorcycle into neutral. Flip the engine stop switch, located on the right handlebar, into the "Run" position, then push the starter button for two seconds. The starter solenoid should make a clicking sound while providing a 12-volt reading on the voltmeters display, indicating that power is being routed from the starter button to the starter solenoid and relay. Flip the engine stop switch to the "Off" position to stop the engine, then flip it back to the "Run" position if the engine successfully started. Remove the solenoid for inspection if it did not click. If the voltmeter did not provide a 12-volt reading, there is a problem between the starter and the starter button.
Bench Testing
Step 1
Turn the ignition switch to the "Off" position and remove the seat from the motorcycle, using either a flat-head screwdriver or by unscrewing the seat bolt by hand. Disconnect the negative cable from the battery using a Phillips-head screwdriver. Pull the negative cable away from the battery and the motorcycles frame.
Step 2
Remove the drain bolt from the bottom of the primary chaincase housing, located under the round derby cover, using a Torx driver. Drain the primary fluid into a catch pan, then screw the drain bolt into place by hand. Tighten the drain bolt to 22 foot-pounds using a torque wrench. Remove the primary chaincase cover using a Torx driver. Remove the rear cylinder exhaust pipe using a socket wrench. This step applies only to Sportster models.
Step 3
Remove all wiring connections from the starter solenoid and starter motor, using a combination wrench. Unscrew the starter mounting bolts using a socket wrench. The bolts are from the right side of the engine on most Harley-Davidson models; however, Sportster models locate the bolts within the primary chaincase on the left side of engine. Pull the starter out from the right side of the engine.
Step 4
Cut two 3-foot-long lengths of 14-gauge primary wire and strip 1/4 inch of insulation from both ends of the wires using a combination wire cutter and stripping tool. Place alligator clips on both ends of the wires. Connect one end of both wires to a fully-charged 12-volt batterys negative terminal. Connect one of the free clips to the starter solenoids field coil terminal, located on the right side of the terminal. Connect the remaining clip to the starter solenoid housing to serve as a ground connection.
Step 5
Cut and strip a third length of wire, then attach an alligator clip to both ends. Connect one clip to the batterys positive terminal. Connect the free clip to the starter relay terminal on the left side of the starter solenoid. The solenoid pinion gear, exposed at the inner face of the solenoid, should click and retract into the starter housing. The starter solenoid is defective if the pinion gear does not retract.
Step 6
Disconnect the field coil terminal clip from the batterys negative terminal. Move the clip to the batterys positive terminal. The solenoid pinion gear should remain in a fully-retracted position. The starter solenoid is defective if the pinion gear extends at this point.
Step 7
Remove the clip from the starter relay terminal on the left side of the solenoid. The pinion gear should extend outward. The starter solenoid is defective if the pinion gear does not extend outward into its at-rest position.
Step 8
Slide the starter motor into position from the right side of the engine. Screw the starter motor mounting bolts into place and tighten them to 22 foot-pounds. Reconnect all wiring connections to the starter solenoid.
Step 9
Reinstall the primary chaincase cover. Tighten the primary cover bolts to 110 inch-pounds. Remove the derby cover using a Torx driver, then fill the primary chaincase with 1 quart of Harley-Davidson Sport-Trans fluid. Reinstall the derby cover and tighten the cover bolts to 50 inch-pounds, alternating between bolts in a crisscross pattern. Reinstall the rear cylinder exhaust pipe and tighten the exhaust pipe nuts to 96 inch-pounds. This step applies only to Sportster models.
Reconnect the negative cable to the batterys negative terminal. Reinstall the motorcycles seat.
Warning
- Do not dump used primary fluid down a drain or into a trash can. Instead, take the fluid to a Harley-Davidson repair center for disposal.
Items you will need
- Combination wrenches
- Soldering iron
- Flat-head screwdriver
- Voltmeter
- Phillips-head screwdriver
- Torx driver set
- Catch pan
- Torque wrench
- Socket wrench and sockets
- Primary wire, 14-gauge
- Combination wire cutting and stripping tool
- Alligator clips
- 1 quart Harley-Davidson Sport-Trans fluid


