
Contenu

Steampunk types might romanticize the aesthetic today, but a world rendered apart by huge saws and held together by rivets and bolts was never going to reach its full potential. No mechanical connection could ever be as reliable as a connection fused together at the molecular level, and machine-based cutting methods had already reached their limits by the 20th century. So, the world had to move past mass assembly with rivets and bolts, and into an era where the pure, awesome power of fire and molten metal reigned supreme.
Step 1
Secure the oxygen and acetylene tanks in the torch cart. This step is an important one for the safety of you and others in the vicinity, so dont skip it. If you dont have a cart yet, secure the tanks to an upright beam or some other vertical solid object using appropriate tie-down straps.
Step 2
Remove the covers protecting the tank valves and attach the regulators to the valves. Screw the fittings into the valves as far as you can by hand and then tighten securely with a wrench.
Step 3
Attach the hoses to the regulators. Connect the green hose to the oxygen regulator and the red hose to the acetylene regulator.
Step 4
Connect the other end of the hoses to the torch handle. Push the cutting torch in to the torch handle and hand-tighten the nut. Close the valves on the torch handle and the cutting torch.
Step 5
Turn the valve on the oxygen tank completely open. The valve has a seal on the shaft that works when the valve is fully open and helps prevent oxygen loss when the torch is in operation.
Step 6
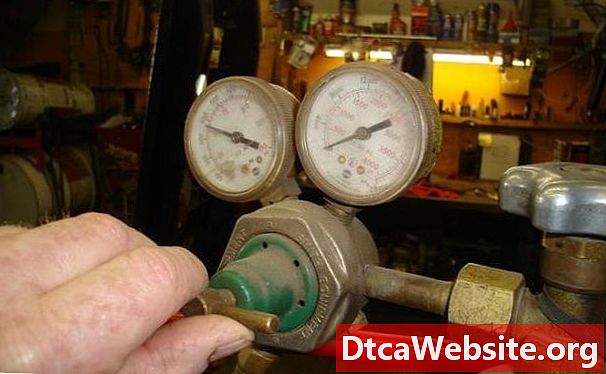
Turn the adjusting screw on the oxygen regulator clockwise until the small gauge on the regulator registers somewhere in the 40 to 60 psi range.
Step 7
Turn the valve on the acetylene tank counterclockwise a quarter turn to open. Adjust the acetylene regulator until the small gauge on the regulator registers 10 psi. Open the oxygen valve on the torch handle completely by turning counterclockwise until it stops.
Step 8
Slightly open the oxygen valve on the cutting torch. Open just enough to start the flow of oxygen through the torch. Open the acetylene valve on the torch handle about 1/8 turn, or 45 degrees.
Light the torch with a spark lighter and adjust the acetylene valve on the torch handle and the oxygen valve on the cutting torch until the flame has no yellow areas and the center is bright blue and well defined. Check the regulator gauges and adjust as necessary to maintain the proper pressures.
Warnings
- Always disconnect the regulators from the tanks and put the valve covers on before taking the tanks from the torch cart or when transporting in a vehicle.
- Always use torches with the tanks in the upright position only.
Items you will need
- Oxygen-acetylene torch set
- Torch cart
- Oxygen tank
- Acetylene tank
- Wrench set
- Spark lighter


