Contenu

A sway control is a dampening device that is attached at one end to a tow vehicle and at the other to a trailer tongue. Its designed to reduce uncontrolled, side-to-side movement of the trailer. Sway is uncontrolled swiveling on the tow package ball caused by momentum as opposed to towing force; such momentum is prevalent when cornering. Because of their high, flat, sail-like side profiles, and because most of their weight is in their lower third, travel trailers are susceptible to sway when subjected to side-winds, including those caused by passing trucks.
Step 1
Park the tow vehicle and trailer on a level surface. Leave the trailer tongue connected and locked onto the tow package.
Step 2
Position the sway control ball attached to a shaft so that its shaft aligns with a hole combination through the tow vehicle’s tow bar. Tow bars are usually adjustable in length; there are several holes in the outer sleeve and several holes through the inner rod, only one combination of which is occupied by the tow bar’s own locking pin. Pass the shaft of the sway control ball through a vacant combination, then use a socket set to secure it in place by tightening the supplied lock washer and nut.
Step 3
Use a permanent marker pen to scribe a mark on the trailer tongue, having used a tape measure to measure backward from the coupler as directed by the sway control’s instructions. The usual distance is between 20 and 24 inches. Make the mark on the side of the tongue corresponding to the side of the tow vehicle’s tow bar where the sway control ball is now fitted. Offer the sway control ball attached to a plate up to the mark and use the permanent marker to make dots through the plate’s four fastener holes.
Step 4
Drill holes through the tongue rail at the four marks. The appropriate drill bit to accommodate the supplied nut-bolt-washer combinations will be specified by the installation instructions; typically a 3/8-inch bit is adequate. Use a socket set to secure the sway control ball attached to a plate in place with the supplied fasteners.
Step 5
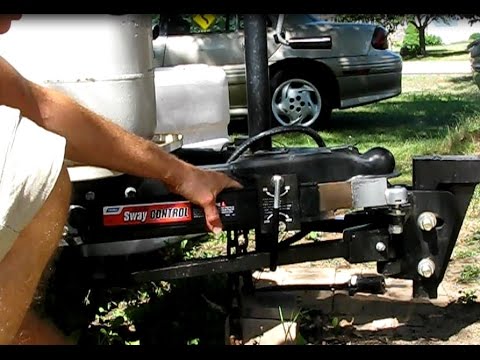
Apply a lubricating grease to both sway control balls if supplied or recommended by the manufacturer, then locate the receiver at either end of the sway control bar over the two balls and press them downward until they engage. Lock them in position as instructed by the documentation; usually two cotter pins are provided.
Follow the manufacturer’s instructions to calibrate the sway bar; typically this is done by hand-tightening an external locking ring or an on-off handle, driving the tow vehicle a short distance with the trailer still located, then retightening the ring or handle.
Warning
- According to the experts at Drawtite, (REF 1) “when towing during slippery conditions such as wet, icy, or snow-covered roads or on loose gravel, turn on/off handle counterclockwise until all tension is removed from unit. Failure to do so could prevent tow vehicle and trailer from turning properly.”
Items you will need
- Sway control kit
- Socket set
- Tape measure
- Permanent marker pen
- Electric drill with bit
- Lubricating grease (optional)


