
Contenu
- Remove the Drive Belt
- Step 1
- Step 2
- Step 3
- Step 4
- Step 5
- Remove the Alternator
- Step 1
- Step 2
- Step 3
- Step 4
- Step 5
- Step 6
- Install the Alternator
- Step 1
- Step 2
- Step 3
- Step 4
- Step 5
- Install the Drive Belt
- Step 1
- Step 2
- Step 3
- Step 4
- Step 5
- Items you will need

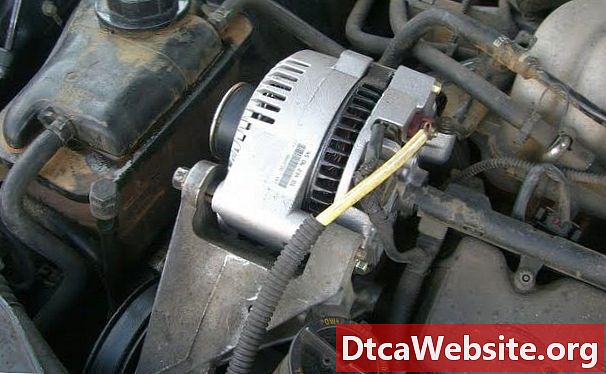
The alternator on your Chevy Trailblazer uses the engines rotational power to produce electrical power for the various systems on the vehicle. As part of the charging system, it also recharges your car battery. Overtime, alternators may develop electrical or mechanical problems, failing to deliver the necessary output voltage or operate properly. Before you are left stranded with a bad alternator, follow this guide to replace the unit on your Trailblazer.
Remove the Drive Belt
Step 1
Look for the drive belt routing diagram on the engine compartment of your Trailblazer. Depending on your particular model, this could be fixed to the upper radiator cover/frame or near one of the strut towers inside the engine compartment. If there is not one in your vehicle, make a quick sketch diagram on paper as a guide so that you can re-install the belt properly, if necessary.
Step 2
Detach the air cleaner duct from the throttle body, if you have a 5.3L or 6.0L engine model. (https://itstillruns.com/use-ratchet-5114732.html) and socket.
Step 3
Insert a 3/8-inch-drive breaker bar into the drive-belt tensioner arm. If you have a 5.3L or 6.0L engine model, use a breaker bar and hex-head socket.
Step 4
Rotate the breaker bar clockwise to release the belt tension.
Step 5
Slip the belt off the alternator pulley.
Release the belt tensioner arm slowly to avoid damage to the mechanism.
Remove the Alternator
Step 1
Disconnect the ground, black battery cable using a wrench and secure the cable terminal away from the battery.
Step 2
Unscrew the A/C line-mounting bracket attached to the right-engine lift hook using a wrench or ratchet and socket if you have a 4.2L engine.
Step 3
Unscrew the right-engine lift hook from the engine too using the wrench or ratchet and socket if you have a 4.2L engine.
Step 4
Unplug the alternator electrical connector and remove the battery cable using a ratchet and socket if you have a 5.3L or 6.0L engine.
Step 5
Unbolt the alternator from the engine. Use a ratchet, ratchet extension and socket if you have a 4.2L engine model. On 5.3L and 6.0L engine models, remove the two lower mounting bolts using the ratchet, ratchet extension and socket.
Step 6
Move the alternator away from the engine just a few inches if you have a 4.2L engine model. Look for the battery cable attached to the alternator and remove it with the ratchet and socket.
Remove the alternator from the vehicle.
Install the Alternator
Step 1
Set the alternator in place and attach the battery cable to the alternator using the ratchet and socket if you have the 4.2L engine model.
Step 2
Install the alternator mounting bolts by hand. Then tighten the bolts using the ratchet, ratchet extension and socket.
Step 3
Plug the alternator electrical connector and attach the battery cable using the ratchet and socket if you have a 5.3L or 6.0L engine.
Step 4
Install the right-engine lift hook using the wrench or ratchet and socket if you have the 4.2L engine model.
Step 5
Attach the A/C line-mounting bracket to the right-engine lift hook using the wrench or ratchet and socket if you have the 4.2L engine model.
Connect the ground, black battery cable using the wrench.
Install the Drive Belt
Step 1
Route the drive belt through all the pulleys but skip the belt tensioner pulley. If you have the 5.3L or 6.0L engine model, skip the alternator pulley.
Step 2
Insert the 3/8-inch-drive breaker bar into the drive-belt tensioner arm if you have the 4.2L engine model. On 5.3L and 6.0L engine models, use the breaker bar with the hex-head socket.
Step 3
Rotate the breaker bar clockwise.
Step 4
Slip the belt onto the tensioner pulley if you have the 4.2L engine model or the alternator pulley if you have a 5.3L or 6.0L engine model.
Step 5
Release the belt tensioner arm slowly.
Attach the air cleaner duct to the throttle body (if you have the 5.3L or 6.0L engine model) using the ratchet and socket.
Items you will need
- Ratchet and socket set
- 3/8-inch breaker bar for 4.2L engine models
- Breaker bar and hex-head socket and for 5.3L and 6.0L engine models
- Wrench
- Ratchet extension


