
Contenu

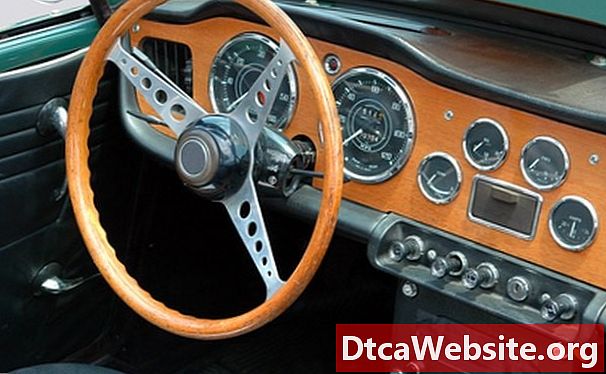
The aftermarket car parts business is a multimillion dollar industry. Aftermarket parts are used to customize automobiles. Most interior aftermarket parts are made from plastic. Many are expensive and difficult to find, especially if the car in question is older. Use a few basic fabrication techniques and shop tools to create plastic car parts, such as a dashboard face, at a small fraction of retail cost.
Step 1
Remove the part to be replaced. Create a cardboard template of the part by tracing the part’s shape and any holes or openings onto the cardboard using a pencil. Carefully follow the contour of the part to ensure that the replacement part remains the same size as the original. Choose the plastic to be used to fabricate the replacement part in a thickness close to that of the original.
Step 2
Lay the original part on a flat work surface. Some parts have a contoured or curved surface, which can be duplicated by heating up the plastic and bending it to the original parts shape. Use a heat gun, set on high, to soften the plastic. Lay the sheet plastic on top of the original piece, lining up the traced pencil line with the parts outline. Apply heat until the plastic starts to develop the desired contour or curve. Heat the sheet plastic only until it starts to change shape. Stop when the desired contour is formed. This method works best for slight curves or contours. Allow the part to cool.
Step 3
Cut out the part’s shape out, using a jigsaw. The jigsaw’s blade should have 10-to-13 teeth per inch and be rated for use with plastic. Leave the protective backing paper on both sides of the plastic to avoid scratching while cutting and drilling. Follow the outline of the template carefully, staying approximately 1/32 inch outside the drawn line.
Step 4
Drill and cut any required holes. Holes up to 1 5/8 inches use standard drill bits. For holes between 1 ¾ to 3 inches in diameter, use a hole saw, which has a circular set of teeth designed for cutting large holes. The hole saw attaches to a standard electric drill. Holes larger than 3 inches should be cut out with a jigsaw. Drill a pilot hole slightly larger than the jigsaw blade, insert the blade into the hole and follow the line drawn on the template with the jigsaw’s blade.
Step 5
Sand the edges and insides of all holes by hand, using 220-grit sandpaper. Sand the drilled and cut edges until they are completely smooth. Wipe off the residual sanding debris with a 100 percent cotton rag. Leave the protective backing on both sides of the plastic during this process.
Step 6
Polish the sanded areas from Step 4 with a plastic buffing compound until a glass-like finished is achieved. Polishing compounds come in two grades, one for heavy scratches and one for light scratches. Use a compound designed for light scratches. Use only a 100 percent cotton rag for polishing because other fabrics can scratch the plastic.
Step 7
Fit the fabricated part into position to check the parts fit. If the piece is tight, sand the part down with 220-grit sandpaper and polish the sanded area with buffing compound.
Remove the protective backing and wipe the piece down with a 100 percent cotton rag. Mount the piece, and the project is complete. If mounting the piece without any mechanical fasteners, such as screws, use a clear epoxy glue designed for use with plastics.
Items you will need
- Heat gun (optional)
- Jigsaw
- Drill
- Drill bits
- Hole saw
- 220-grit sandpaper
- Plastic polishing compound
- 100 percent cotton rags
- Painter’s masking tape
- Clear epoxy glue (optional)


