Contenu

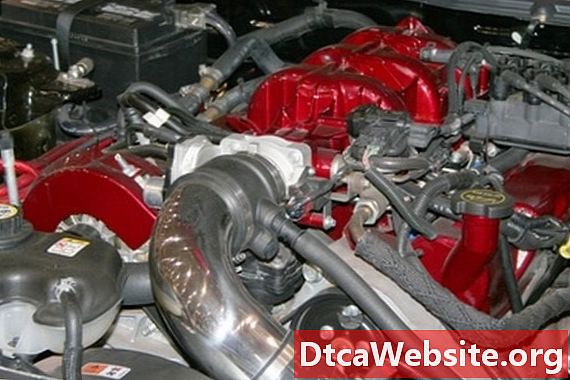
Electronically controlled fuel injection has replaced the carburetor and manifold setup that was so popular on older make automobiles. By using a cam or crankshaft sensor, fuel regulator, and manifold absolute pressure, a precise amount of fuel is sent through each injector head where it atomizes and discharges into the cylinder head. Fuel injection improves cold engine starting, reduces harmful emissions, boosts fuel economy and overall performance. If a fuel injector leaks internally it can cause an overly rich mixture. External injector leaks can cause fire hazards. Finding injector leaks involves a few steps and some required tools.
Step 1
Make sure your vehicle sits in park or neutral, depending upon your transmission type. Apply the emergency brake. Raise the hood. Remove the negative battery cable with a socket. Hold a shop light over the fuel injection rail. If you have a cold air intake box in the way, remove it with a screwdriver or socket, depending upon the fastener.
Step 2
Look very closely at each fuel injector head where it connects to the fuel rail. Look for any obvious dribbling leaks or fuel spray pattern on the rail, injector body or cylinder head. Smell for gas. A leak at the injector head will indicate bad O-ring seals inside the injector body.
Step 3
Locate the service valve port on the fuel rail. It will look like a tire Shrader valve with a pressure release pin. Use the tip of a screwdriver to push the pin in to depressurize the system. If your fuel rail has a removable cap, use a socket to slowly unscrew the cap while holding a rag over it.
Step 4
Refer to your owners manual for the location of the fuel pressure test fitting on the rail. Fit a fuel pressure gauge to the pressure test fitting, by screwing it on or using the push-on adapter. If your fuel rail does not have a pressure test fitting, use a fuel line wrench to disconnect the fuel inlet line just behind the fuel rail. Attach a T fitting between the fuel line and the injector inlet location. Attach the pressure gauge hose to the middle of the T fitting.
Step 5
Temporarily connect the negative battery cable by hand. Cycle the ignition key to the "on" position several times and turn it off -- this will re-pressurize the system. Look at the reading on the gauge. Refer to your owners manual for the correct psi, or "pounds per square inch," for a residual pressure test. Depending on the vehicle, the reading will be anywhere from 30 to 80 psi. The pressure should hold for several minutes without dropping. Any pressure drop below specifications indicates one leaking, or several leaking injectors.
Step 6
Remove the negative battery cable from the battery. Depressurize the fuel rail, if you have pressurized it for the residual pressure test. Disconnect the fuel injector wires from the fuel injector heads, by unsnapping the clips. Use a fuel line wrench to loosen the fuel rail inlet line. Use a socket, extension and wrench to loosen the mounting bolts on the fuel rail. Use hand pressure to pull the fuel rail up and off the injectors.
Step 7
Use a fuel injector puller tool to remove each injector, by placing the clasping device of the tool around the lip of the injector. Pull the injector straight up and out. Remember which injector fits into its receiving port on the fuel rail. Fit each injector head back into its receiving port on the fuel rail and push them in by hand. Position the fuel rail so you can reconnect the fuel inlet line to it. Use a fuel line wrench to connect the fuel line to the fuel rail.
Step 8
Temporarily reconnect the negative battery cable to its terminal. Cycle the ignition key to the "on" position several times to re-pressurize the fuel rail. Look very carefully at the fuel injector tips. None of them should squirt or dribble any fuel. Any leaks at the injector tips indicates bad internal valve seals in the injector bodies. Replace all leaking fuel injectors.
Disconnect the negative battery cable at the terminal. If you have found any leaking fuel injectors, now will be the time to replace them all, since bad seals usually fail around the same time. Reassemble all the components you removed in the reverse order you took them off. Remember to put the injectors back into their original fuel rail locations. Keep the negative battery cable disconnected until the end of the assembly process.
Tip
- Fuel injection systems and designs come in myriad configurations depending upon the year, make and model. Refer to your owners repair manual for the correct specifications for your engine. Make sure you know what components impede access to the fuel rail when removing it. Make diagrams and records notes so that you remember the reassembly procedure.
Warning
- Do not smoke anywhere near the engine when you perform fuel injection tests and depressurizing the system. Spraying gas is highly flammable.
Items you will need
- Owners repair manual
- Shop light
- Screwdrivers
- Socket set
- Socket extension
- Ratchet wrench
- Fuel line wrenches
- Fuel pressure gauge
- Fuel injector puller


