
Contenu
- Construct the Base of the Trailer
- Step 1
- Step 2
- Install the Tongue and Axle Assembly
- Step 1
- Step 2
- Install Trailer Lighting, Flooring and Trailer Coupler
- Step 1
- Step 2
- Tip
- Items you will need
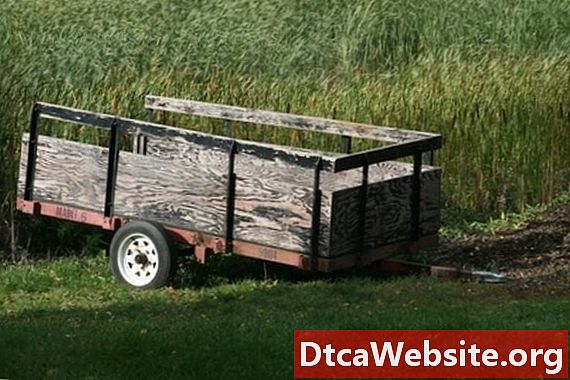
Small trailers are a boon to homeowners as well as small businesses. From professional landscapers to weekend do-it-yourself enthusiasts, trailers perform essential service to those who haul their own building materials or help friends and neighbors on moving day. Building a trailer from scratch not only helps save money on the trailers cost, but also allows you to personalize the trailer whatever way you see fit.
Construct the Base of the Trailer
Step 1
Lay out the angle iron on a flat surface, aligning two 12-foot sections 6 feet apart with the angles facing one another. Cut away a 45-degree notch on each end of the 12-foot sections bottom lip with a metal-cutting saw. These pieces will form the side rails.
Step 2
Cut two 6-foot lengths of angle iron and lay one at each end of the 12-foot sections to form a rectangle on the ground. Use the reciprocating saw to cut away a similar 45-degree tab from each end of both 6-foot sections so that they fit snugly with the 12-foot sections. Check that the angle is a perfect 90 degrees between the 6- and 12-foot sections using a framing square, then tack weld each corner into place. When you are certain that all corners line up at 90 degrees, complete the welding of the four corners of the trailer.
Turn the frame over so that the flat end of the angle iron is facing up. Cut three additional lengths of 6-foot angle iron and lay these out as braces every 3 feet, spanning the distance between the 12-foot side rails. Tack weld these into place after ensuring that they are at 90 degree angles to the 12-foot side rails.
Install the Tongue and Axle Assembly
Step 1
Cut a 2-inch notch in center of the first angle iron brace to allow the 12-foot section of square steel tube to fit snugly against the bottom of the trailers frame. The second angle iron brace from the front of the trailer will not be notched. Lay the square steel tube into the notch and butt it snugly against the second angle iron brace. Ensure that the tongue is at a perfect 90-degree angle to the trailer, then weld it in place at the three points where it touches the frame. Not ensuring that the tongue is at 90 degrees will result in poor tracking of the trailer while driving and can cause accidents.
Step 2
Measure from the front of the trailer back 7 feet on each side and place the axle assemblys center point here. Measure all points on the axle from front to back on the trailer to ensure that it is properly fitted, then weld or bolt the leaf spring suspension into place.
Install the trailer tires, then turn the trailer over.
Install Trailer Lighting, Flooring and Trailer Coupler
Step 1
Install the trailer coupler by drilling through the square tube steel where necessary and it bolting securely in place. Welding is not recommended here in case of damage to the coupler in the future.
Step 2
Run the trailer light wiring through the square tube to the back of the trailer. Install the brake and side marker lights, then wire them appropriately according to the trailer light packaging directions.
Install the 12-foot-long pressure-treated flooring onto the trailer with galvanized carriage bolts. Pre-drill the necessary holes through the boards and angle iron, fastening them tightly together for safety.
Tip
- Install side rails on the trailer with additional angle iron to increase the trailers versatility. Remember to register and have your trailer inspected by a highway patrol officer before attempting on-highway use.
Items you will need
- Six 2-by-12-inch, 12-foot-long, pressure-treated boards
- Trailer axle assembly with suspension
- Two trailer wheels with tires
- 60 feet of 2-by-2-inch angle iron in 12-foot sections
- 1 12-foot section of 2-by-4-inch square tube steel
- Trailer coupler with a 2-inch channel
- Trailer wiring
- Trailer lighting kit
- Metal inert gas welder
- Welding helmet
- Welding gloves
- Tape measure
- Reciprocating saw with a metal-cutting blade
- Galvanized carriage bolts
- Drill and drill bits
- Framing square


