Contenu

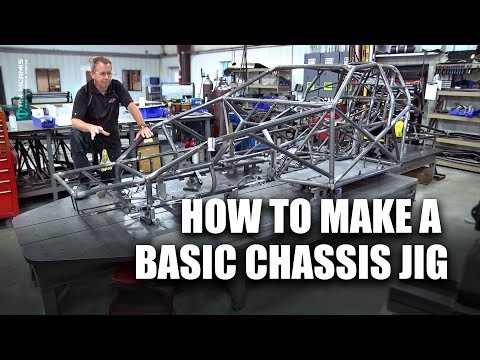
Building a race car frame jig -- or chassis jig, as it is referred to by those in the industry -- requires accurate measurements and great detail. The detail needed to build a chassis jig is important so the jig will produce superior race cars every time. For your chassis jig to be functional, you must build it out of strong material that is bolted together, not welded. The only parts you can weld are the bolt-on parts. The jig must be level, square and produce true and accurate measurements. To make welding the chassis more convenient, you should raise it off the floor .
Step 1
Drill twenty-five 5/16-inch holes into the 1/2-inch thick, 5-inch square plate. The plate requires five rows of five holes. Accurately scribe a line 1/2-inch inch from the edge of all four sides of the plate. Scribe three more lines, 1-inch from the previously scribed lines both horizontally and vertically to form a grid with a 1/2-inch frame around it. Prick punch all intersecting lines accurately. Drill all punched marks with a 1/8-inch drill bit in a drill press. Once complete, re-drill all 25 holes using a 5/16-inch drill bit in a drill press. Mark this plate as the template. Also make a top mark and a left side mark on the template. You will use this template as a pattern to reproduce and drill more plates.
Step 2
Place the drilled template on top of another 5-inch square plate. Be sure the plates are flush on all sides, clamp them together, and drill all 25 holes into the plate using the template as a guide. Repeat this until all plates are drilled.
Step 3
Stand the drilled plate up on top of another 5-inch square plate forming an angle. Use a machine square to check the square of the angle formed from the two plates. Weld two small 1/4-inch beads on the outside of the plates near the ends, and weld two more beads on the inside of the joined plates, near the ends. These two plates should form an accurate and perfectly square angle after welding.
Step 4
Position the two 18-foot rectangular jig tubes with the 5-inch side facing up. Place the newly formed 5-inch square angle or template onto the tube, with the drilled plate squarely covering the 5-inch side of the jig rail tube. Tap the template angle into place. Be sure template is flush with the end, top and bottom of the jig tube. Clamp the template to the tube with a C-clamp.
Step 5
Drill all 25 holes into the chassis jig tube, using the angle template as a guide. The hand drill you use to drill into the tube should have a sharp, high-speed 5/16-inch drill bit in it. Once you have drilled all 25 holes, slide the template further up the tube. Align the last row of drilled holes with the first row of holes in the template. Insert five 5/16-inch by 1-inch bolts into the holes like pins to assure the template is aligned, then clamp the template to the tube. This time drill only 20 holes into the jig tube, because five holes are filled with bolts for alignment. Repeat this procedure until both 18-foot jig tubes are completely drilled from end to end on the outside and inside.
Step 6
Tap all of the holes drilled in the main chassis tubes with a 3/8-inch coarse thread tap. There are a lot of holes to tap, but they only need to be tapped once and it makes the chassis jig easy to fabricate the needed bolt-on brackets. When a new bracket is required, bolt on a new plate and weld the fabricated bracket to the plate only.
Step 7
Line the two 18-foot jig rails up parallel to each other. Enlarge the 25 holes in four of the square plates using a 3/8-inch drill bit. Bolt two steel plates, one on the inside end of each tube. Use ten 3/8-inch bolts in the two vertical rows nearest to the two vertical edges of each of the four plates.
Step 8
Stand the two 18-foot jig tubes on edge with the bolted plates facing inwards toward each other. Slide the two 18-foot jig tubes apart and insert the 27-inch tubes on edge centered between the plates at both ends to form a large rectangle chassis jig. Square the tubes with the 27-inch cross braces and be sure they are flush on top. Tack weld the 27-inch tubes to the steel plates bolted to the inside of the jig rails. Re-check the 27-inch tubes for square and flush and weld them solid to the plates.These inside braces must be perfectly square and flush after welding.
Grind the welds off the template angle and separate the two plates. Keep the template as a pattern to fabricate as many 5-inch square plates as needed to build bolt-on chassis brackets. When building the original race car, clamp the race car chassis tube to the jig rails and bolt on the needed plates for brackets to hold roll cage uprights and other chassis components in place.
Tips
- Mark a bottom and top on the drilled template.
- Mark both 18-foot tubes with a top, bottom, an inside and outside. Keep the tubes seam on the inside and/or on the bottom of the jig tubes.
- Chassis plates can be made out of 1/4-inch steel plates for less stressful brackets.
- Be sure the template is drilled with 25 symmetric holes in it.
- It would be completely acceptable to have all the plates drilled by a machine shop to assure perfect accuracy.
- Use the two 18-foot jig rails for the main frame of the chassis to be fabricated. Make and bolt on wings or extensions as needed by welding only to the plates, never to the jig rails.
- Use more bolt-on plates to weld four legs on the jig to raise it off the floor.
Warnings
- Always wear safety glasses when using a grinder or power tools.
- Cover all exposed skin to prevent radiation burns when welding.
- Never weld to the actual jig tube rails, only to the bolted plates or inter-braces.
Items you will need
- Safety glasses
- Welder
- Drill motor
- Drill press
- Tapping oil
- Scribe
- Machine square
- 5/16-inch drill bit
- Hand grinder
- Wrench set
- 3/8-inch coarse thread tap
- 2 lengths of 3/8-inch wall tubing, 3 by 5-inch by 18 feet
- 2 lengths of 3/8-inch wall tubing, 3 by 5-inch by 27 inches
- 6 Steel plates, 5-inch square by 1/2-inch thick
- Prick punch
- 5/16-inch center punch
- C-clamp
- 5 bolts, 5/16-inch by 1 inch
- 40 bolts, 3/8-inch by 3/4-inch


