Contenu
- Step 1
- Step 2
- Step 3
- Step 4
- Step 5
- Step 6
- Step 7
- Step 8
- Step 9
- Step 10
- Step 11
- Step 12
- Step 13
- Step 14
- Step 15
- Items you will need

Brake maintenance is an important part of ensuring overall motoring safety. The brake components should always be in optimum condition. When air has gotten into the brake lines of your Dodge Dakota, the likely result is that the brakes will fail to respond as expected during braking. The air is compressible while the brake fluid is not. Compression of the air will decrease the pressure applied to the brake caliper, slowing the operation of the brakes, and making possible a catastrophic delay in brake function. Bleed the brakes to rid the lines of air.
Step 1
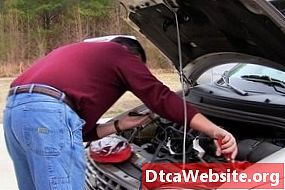
Open the Dodges hood and remove the master cylinder cap. The master cylinder is located near the front windshield, on the drivers side of the truck.
Step 2
Retrieve the spare tire from beneath the bed of the truck. Place the bleed kit hose onto the filler nozzle of the tire.
Step 3
Connect the bleed kit hose from the spare tire to the opening of the master cylinder. Lay the tire across the engine.
Step 4
Loosen the Dakotas lug nuts with the lug wrench (1/2 turn). All of the wheels will need to be removed, so loosen all of the lug nuts at the beginning.
Step 5
Place the jack beneath the frame at the rear of the truck and lift the vehicle until the tires are clear of the ground by two inches. Lower the vehicle onto jack stands to support the truck during the bleeding.
Step 6
Remove the back wheels/tires.
Step 7
Place the wrench around the bleed valve located behind the right brake caliper. Place the bleed kit tube onto the valve. place a drip pan beneath the brake assembly. Direct the end of the tube into the pan.
Step 8
Open the bleed valve with the wrench. Turn the wrench one half turn to begin the flow of brake fluid through the tubing.
Step 9
Monitor the flow of brake fluid through the tube and close the bleed valve when there are no longer bubbles in the stream.
Step 10
Return to the master cylinder to check the level of brake fluid. Replenish the container with brake fluid so as not to empty the master cylinder completely. Repeat the refilling of the fluid after bleeding each brake.
Step 11
Remove the bleed kit tube and wrench from the right rear brake and connect them to the left rear brake bleed valve. Place the drip pan below. Repeat the bleeding process until there are no bubbles visible. Close the valve and remove the bleed kit tube and and wrench.
Step 12
Replace the rear wheels and screw on the lug nuts. Lowering the truck to the ground. Tighten the lug nuts with the lug wrench.
Step 13
Lift the front of the truck, rest the vehicle on jack stands, and remove the front wheels.
Step 14
Continue the bleeding process on the right front brake and finally the left front brake.
Step 15
Replace the front wheels, tighten the lug nuts, and lower the truck.
Remove the bleed kit hose from the spare tire and master cylinder opening. Fill the master cylinder with brake fluid until the container reads "full." Replace the cap and close the hood.
Items you will need
- Lug wrench
- Jack
- Jack stands
- Brake bleed kit
- 10 mm wrench
- Drip pan


